
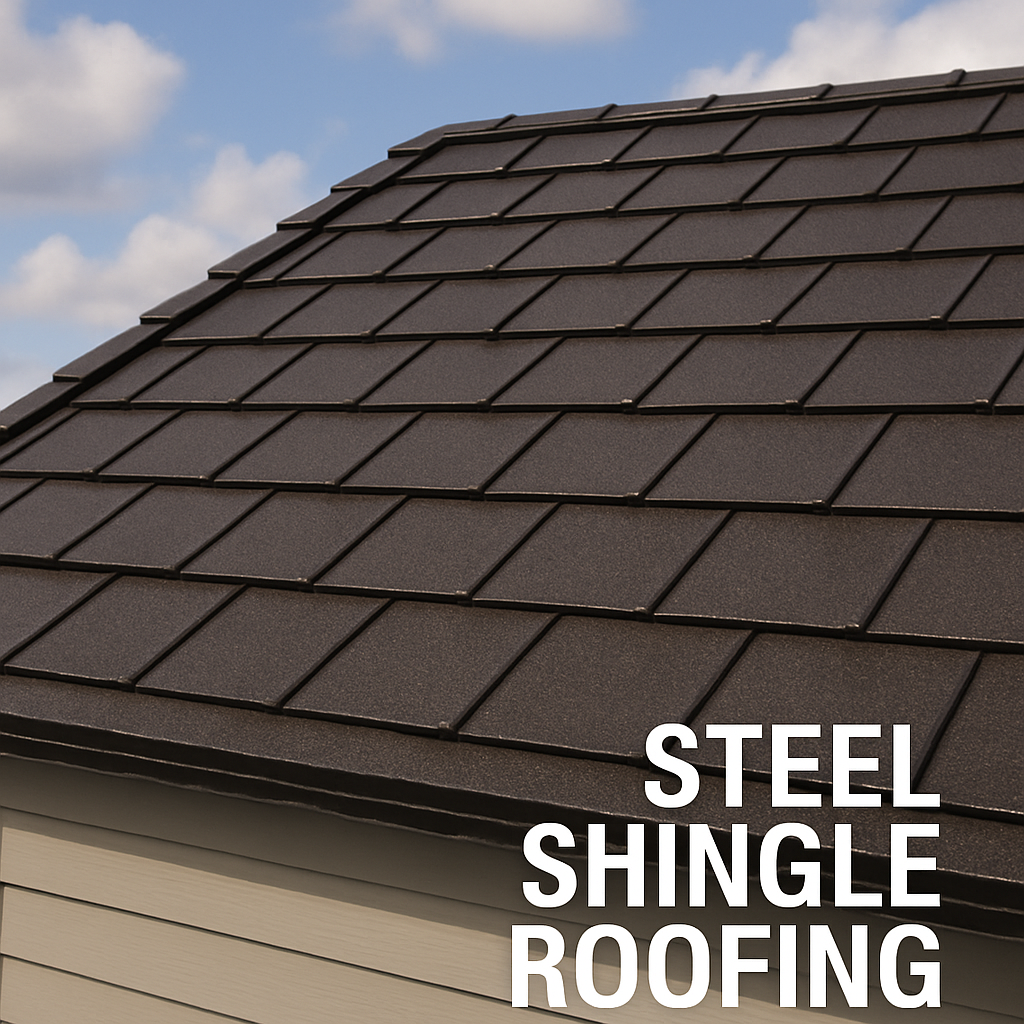
Steel shingle roofing is a type of metal roofing that uses steel panels or shingles. These shingles are known for their longevity, durability, and resistance to harsh weather conditions. Unlike traditional roofing materials that may deteriorate over time, steel shingles maintain their integrity, offering peace of mind to homeowners. They are an excellent choice for homeowners looking to invest in a long-lasting roof that requires minimal upkeep. Additionally, steel shingles can mimic the appearance of other roofing materials, such as wood or slate, making them a versatile option that can suit various architectural styles.
Another significant advantage of steel shingles is their adaptability. They can seamlessly blend with different home designs, offering both contemporary and classic aesthetics. This versatility ensures that homeowners do not have to compromise on style when opting for durability. Furthermore, the innovative design options available in steel shingles allow homeowners to achieve a unique look that can set their home apart. Whether aiming for a rustic charm or a sleek modern appearance, steel shingles provide the flexibility to realize diverse design aspirations.
Advantages of Steel Shingle Roofing
- Durability: Steel shingles are resistant to cracking, shrinking, and eroding, making them ideal for a long-lasting roof. Their robustness against various environmental factors such as heavy rain, strong winds, and snow ensures that the roof remains intact for decades.
- Energy Efficiency: They reflect solar radiant heat, which can reduce cooling costs in the summer. This reflectivity not only contributes to energy savings but also helps maintain a comfortable indoor temperature, reducing the reliance on air conditioning systems.
- Aesthetics: Available in a variety of styles and colors, they can complement any architectural design. The ability to choose from an array of finishes and textures means that homeowners can find the perfect match for their home’s exterior.
- Low Maintenance: Steel shingles require minimal maintenance compared to other roofing materials. Their resistance to mold, mildew, and pests means fewer repairs and less frequent inspections, allowing homeowners to enjoy a hassle-free roofing solution.
Tools and Materials Needed
Before you begin the installation process, gather the necessary tools and materials:
- Steel shingles
- Roofing nails
- Hammer or nail gun
- Measuring tape
- Chalk line
- Roofing felt or underlayment
- Metal snips
- Safety gear (gloves, safety glasses, harness)
- Ladder
Having the right tools and materials is essential for a successful installation. Proper preparation can prevent delays and ensure that the installation process runs smoothly. Additionally, using high-quality materials not only aids in the ease of installation but also contributes to the longevity of the roof.
It is crucial to prioritize safety when undertaking a roofing project. Investing in safety gear like gloves, safety glasses, and a harness can protect you from potential hazards. A stable ladder is also necessary to safely access different parts of the roof. By ensuring that you have all the necessary tools and safety equipment, you can focus on the installation process without unnecessary interruptions.
Preparation Steps
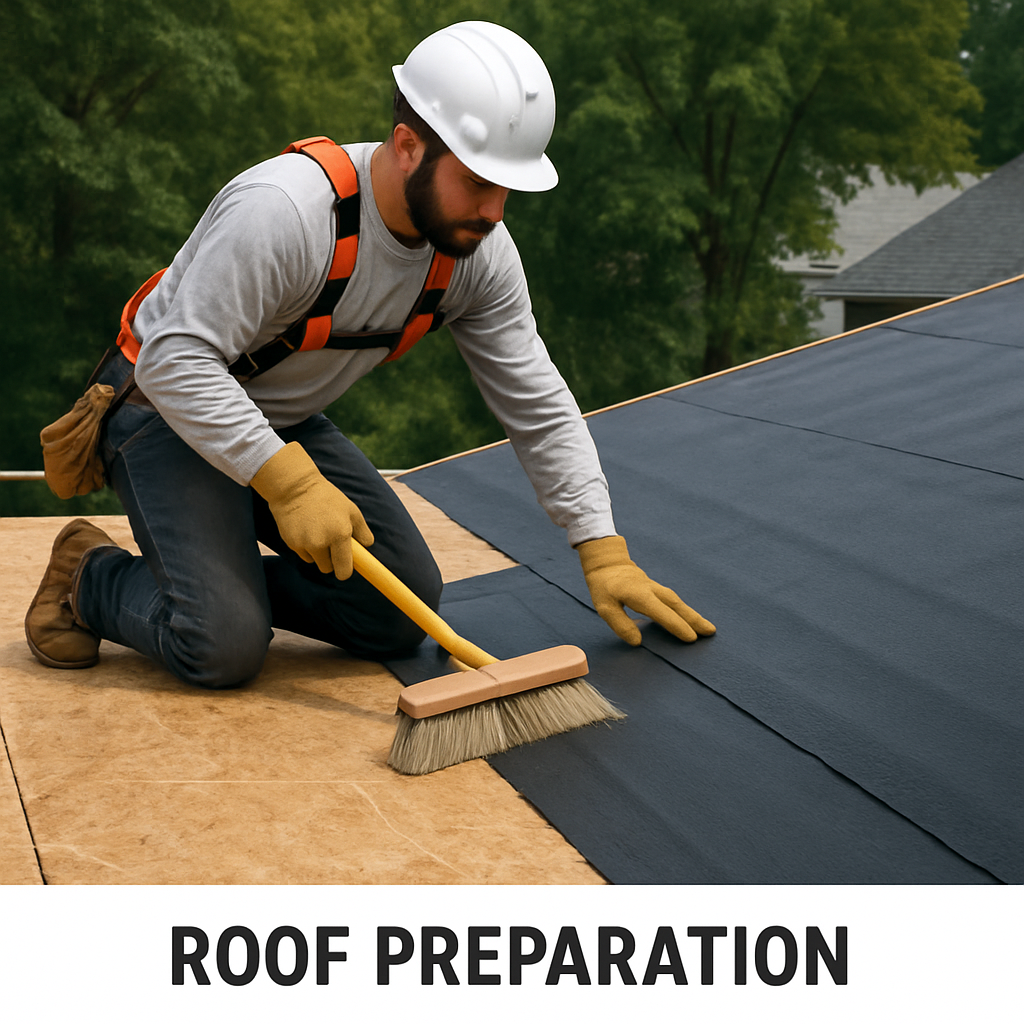
Before you can install steel shingles, proper preparation is crucial. Preparing the roof thoroughly ensures that the new shingles adhere correctly and function effectively. This phase is vital for identifying and addressing any potential issues that could compromise the roof’s performance.
Inspect the Roof
Start by inspecting your existing roof for any damage. Look for signs of leaks, weak spots, or structural issues that need to be addressed. Repair any issues such as leaks or weak spots to ensure a solid base for your new steel shingles. This step is essential to prevent future problems and extend the lifespan of your new roof.
Remove Old Roofing
Remove the old roofing materials to expose the roof deck. Carefully strip away shingles, nails, and underlayment to reveal a clean surface. This step ensures that your new steel shingles will have a flat, secure surface to adhere to, which is crucial for achieving a smooth and professional finish.
Install Underlayment
Lay down roofing felt or underlayment over the entire roof deck. This layer acts as a moisture barrier and provides additional protection against leaks. It is important to cover the entire surface evenly, ensuring that there are no gaps or overlaps. Proper installation of the underlayment is crucial for preventing water infiltration and protecting the roof deck.
Installation Process
Now that your roof is prepped, you can start installing your steel shingles. The installation process requires precision and attention to detail to ensure that the shingles are properly secured and aligned. Following a systematic approach can help achieve a professional finish and maximize the roof’s performance.
Step 1: Measure and Plan
Using a measuring tape and chalk line, mark out the areas where the shingles will be installed. This helps ensure that the shingles are aligned properly and provides a guide for your installation. Accurate measurements and markings are crucial for maintaining the roof’s symmetry and preventing gaps or uneven overlaps.
Planning is an essential part of the installation process. By laying out a detailed plan, you can avoid mistakes and reduce the need for adjustments during installation. Proper planning also helps in estimating the number of shingles required, minimizing waste and ensuring that you have enough materials to complete the project.
Step 2: Start at the Bottom
Begin at the bottom edge of the roof, working your way up. Starting from the bottom allows for proper water runoff and ensures that each shingle overlaps the one below it. This method is crucial for creating a watertight seal and preventing water from seeping underneath the shingles.
The bottom-up approach also provides stability, as the lower rows support the weight of the shingles above. By securing the lower shingles first, you create a strong foundation for the rest of the installation, ensuring that the entire roof is stable and secure.
Step 3: Secure the Shingles
Nail each steel shingle into place using roofing nails. Ensure that the nails penetrate the underlayment and secure the shingles firmly. Use a hammer or a nail gun for efficiency. Properly securing the shingles is essential for preventing them from being dislodged by strong winds or heavy rain.
When securing the shingles, it’s important to follow the manufacturer’s guidelines regarding nail placement and spacing. Adhering to these recommendations ensures that the shingles are anchored correctly and enhances the overall durability of the roof.
Step 4: Overlap the Shingles
As you install each row, make sure the shingles overlap properly. Overlapping helps prevent water from seeping underneath the shingles and causing leaks. Pay attention to the alignment of each shingle to maintain a consistent appearance and maximize the roof’s protective capabilities.
Proper overlapping not only enhances the roof’s waterproofing but also contributes to its visual appeal. A well-installed roof with neatly aligned shingles can significantly enhance the overall aesthetics of your home.
Step 5: Cut Shingles to Fit
Use metal snips to cut any shingles that need to fit around roof edges, vents, or chimneys. Ensure a snug fit to maintain the roof’s integrity. Precision cutting is essential for achieving a seamless finish and preventing gaps that could compromise the roof’s protection.
Cutting shingles to fit around obstacles requires careful measurement and attention to detail. Taking the time to accurately measure and cut each piece ensures that the roof has a professional appearance and functions effectively.
Step 6: Finish with Ridge Caps
Once all the shingles are in place, install ridge caps at the peak of the roof. Ridge caps provide the final layer of protection and help seal the roof against water and wind. They also add a polished look to the roof, enhancing its overall appearance.
Ridge caps are crucial for preventing water infiltration at the roof’s peak. Proper installation of ridge caps ensures that the roof is fully sealed and protected from the elements, providing peace of mind for homeowners.
Final Touches

by Diogo Brandao (https://unsplash.com/@dbrandaof)
Inspect Your Work
After installation, carefully inspect your work to ensure that all shingles are secure and properly aligned. Look for any gaps or misaligned shingles that may need adjustment. A thorough inspection helps identify any potential issues before they become serious problems, ensuring that the roof performs as intended.
Taking the time to inspect your work also provides an opportunity to make any necessary corrections. Addressing minor issues promptly can prevent them from developing into more significant concerns, extending the life of your roof.
Clean Up
Remove any debris or leftover materials from the roof and surrounding area. Keeping the area clean ensures that no materials are left to damage the roof or surrounding property. A clean worksite also enhances safety and prevents accidents caused by loose debris.
Proper cleanup is an important part of the installation process. Disposing of materials responsibly and ensuring that the area is tidy reflects the professionalism of the work and leaves a positive impression.
Check for Maintenance Needs
While steel shingles require minimal maintenance, it’s wise to check for any potential issues periodically. Look for signs of wear or damage, and address them promptly to extend the life of your roof. Regular inspections help identify areas that may need attention, allowing for timely repairs.
Proactively checking for maintenance needs ensures that your roof remains in optimal condition. By addressing minor issues early, you can avoid costly repairs and enjoy the benefits of a well-maintained roof for years to come.
Cost Considerations
When considering steel shingle roofing, it’s essential to factor in the costs. The price can vary based on the quality of the shingles, the size of your roof, and whether you hire a professional installer or do it yourself. Generally, metal shingles cost more upfront than traditional asphalt shingles, but their longevity and durability can lead to savings in the long run.
Investing in high-quality steel shingles can offer significant returns over time. The reduced need for repairs and maintenance, combined with energy savings, can offset the initial investment. Furthermore, the enhanced curb appeal and durability of steel shingles can increase the value of your property.
When budgeting for a steel shingle roof, consider the potential long-term savings and the added value to your home. Weighing the initial cost against the benefits can help you make an informed decision that aligns with your financial goals and home improvement plans.
Conclusion
Steel shingle roofing offers a blend of durability, aesthetic appeal, and energy efficiency, making it a smart choice for many homeowners. By following this guide, you can install steel shingles confidently, ensuring a roof that stands the test of time. Whether you choose to install them yourself or hire a professional, steel shingles are an investment in the future of your home.
Choosing steel shingles means opting for a roof that not only protects but also enhances the beauty and value of your home. With proper installation and maintenance, a steel shingle roof can provide decades of reliable service, making it a worthwhile investment for any homeowner. As you embark on your roofing project, consider the benefits of steel shingles and the peace of mind they offer, knowing that your home is well-protected and visually appealing.
